I competed in Skills Canada Robotics
Skills Canada hosts a robotics competition for the secondary level every year with a different task each time. Competitors build remote controlled robots ahead of time which they bring with them to the competition. There is also an autonomous portion of the competition where we build robots on the competition floor using a set of parts for a challenge which is revealed on competition day.
Our team achieved first place at the national competition, but we are not continuing to worlds as it is not a worlds qualifying year (though a former team from my school is!).
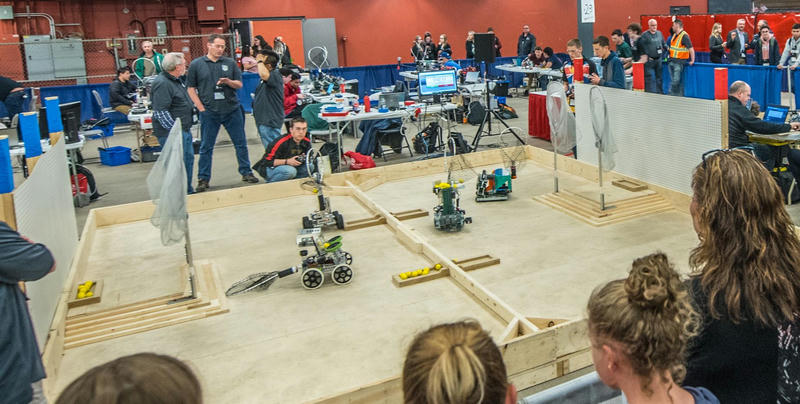
This is the court we played on with some other teams on it. It has hills on both sides (themed after the Citadel in Halifax), with ammo boxes full of foam golf balls on top of the hills and on the court floor. The objective is to pick up and deliver these foam golf balls to the other side using a maximum of 2 remote operated robots (autonomous robots can be used in addition to these two but few teams chose to do this).
Scoring is as follows:
- 1 point for each ball that is delivered onto the court floor of the other side of the court
- 2 points for each ball that is in the nets on the hills at the end of the game
- 3 points for each ball in the nets on the opposing team's robots at the end of the game
- 10 points if all robots with nets end the game on top of the hill as the buzzer sounds
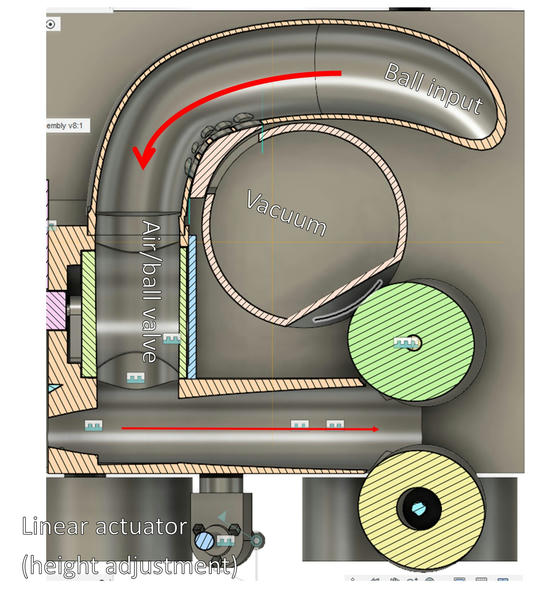
We built two identical robots for the competition, where we 3D printed almost all of the mechanical parts. The robot design we built uses hacked car vacuums to suck up the foam golf balls into a tube where they are buffered. A rotating valve similar to a ball valve is used to allow balls to flow into the launcher and to block off suction to the launcher while collecting balls.
To launch the balls, we use a mechanism similar to a pitching machine which launches balls with two spinning wheels. Balls are pushed into the pitching machine with a server fan.
On the front of the robots, we built a height adjustment mechanism using a 270-degree servo and a rack and pinion from a Tetrix Max kit we got from the last time we went to Nationals.
Technical Details
- there is one 12V 5000mAh lithium polymer battery powering everything
- motor controllers are: Vantec RDFR22 and Sabertooth 2x25, the Vantec for our 4 motor drive system and the Sabertooth for the vacuum and the height adjustment linear actuator. The launcher is handled with a RC relay board which provides on/off control for the fan and motors
- RC system: we use Jumper T8SG-v2 Plus radios on the FlySky protocol; there is a 10 channel receiver installed, and we use 8 of those channels for controlling the robot. I've used a DigiSpark clone board to extend the servo input range of our nozzle height adjustment servo to get full travel as well as output a PWM signal to slow down the server fan (see https://github.com/lf-/ServoExtender).
Evaluation of techniques used
We made extensive use of various fusion welding techniques on the plastics in this year’s design to varying degrees of success. The launcher was heat staked on very successfully. Friction welding was used on the assembly of the vacuum and the tube on it as well as attaching that vacuum and tube assembly to the launcher, also successfully.
We superglued on the fan bracket, which later failed on both robots, one at competition and one in practice. The first one fell off because the robot fell on its back (oops), so I friction welded it back on. The robot fell over again in practice (oops) and broke again so I heat staked it back on (friction welding is hard to redo over an existing weld). The other one fell off at competition, and I don’t think it was because the robot fell over. As it was a glue failure, I friction welded it back on and it was fine for the rest of the day.
Hot glue was used to attach the aiming device, which was generally successful, though airline shipping damage caused us to need to reattach one of them at orientation. Hot glue and velcro have both been used to attach electronics, and I am not satisfied with the results of either on the aluminum buck converters. Further research is required, possibly involving 3d printed backing plates.
Autonomous competition
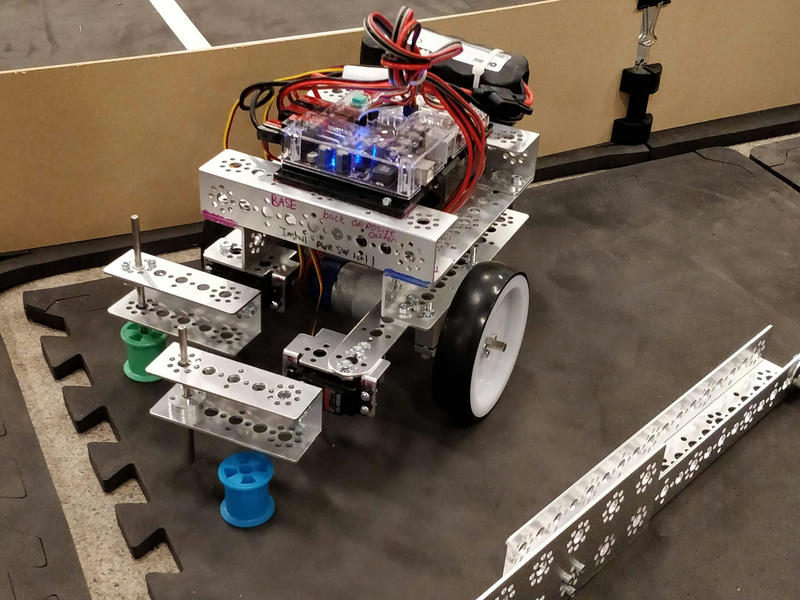
The Skills competition had a segment where competitors were to build robots that drive themselves through a maze and drop off plastic spools in a couple of positions on the court.
We built the simplest and smallest possible frame we could think of, using staggered motors to make it narrower.
The spools were managed by two servos with arms holding pins inside the spools. When the spools are to be dropped, the servo with the pin is simply lifted and the spool deposited.
Our team was the only team to build a significant piece of software ahead of the competition (which you are allowed to do), specifically, I wrote a system that allows for the autonomous robot to be manually driven into each desired position, and the motor encoder counts measured. These counts are dumped to the serial port, and they can then simply be pasted into the program to drive automatically. This turned a 2 day programming task into a 2 hour driving task.
More photos of the robots and of the internal mechanisms, with an emphasis on the 3D printing are available from https://imgur.com/a/de6Y6zK.


